Disclaimer
Any maintenance performed on moving parts and mechanical or electrical systems should be done so by trained personnel. Therefore, any maintenance performed without first consulting our team is done so at your own risk and we assume no liability for personal injury.
Starting the Flow Wrapper
Jogging Mode:
- Press and hold the JOG button (located next to the start and stop buttons).
- The machine will operate at a speed of 30 packages per minute.
- Release the button to stop the machine immediately.
Continuous Running:
- Press the Start button to begin continuous operation.
- The machine will run at the set speed until either the Stop button or the Emergency Stop button is pressed.
Stopping the Flow Wrapper
Normal Stop:
- Press the Stop button.
- The machine will stop with the end sealing knife in the level position.
Emergency Stop:
- Press the Emergency Stop button.
- The machine will halt immediately.
- To restart, press the Reset button before resuming normal operation.
Per Shift Maintenance
Proper daily cleaning helps ensure smooth operation and reduce downtime. Follow these steps after every shift to maintain your flow wrapper's performance.
Steps:
- Power Safety: Before cleaning, always make sure that the machine is off. It is recommended to disconnect power for safety.
- Surface Cleaning: Use a clean, moistened cloth to wipe down the machine surface and working table. You can use a mild 70% alcohol solution. Do not use alcohol on plastic or painted surfaces.
- Remove Film Scraps: Use compressed air to blow away film scraps from the feeding, mid-sealing, and end-sealing mechanisms.
- End Sealing Knife Cleaning: Clean the end sealing stainless steel knife and sealing jaws using a steel wire brush. This should be done after every shift. For Teflon jaws use a moist cloth and beware not to harm Teflon coating. Wipe dry with dry clean cloth.
Monthly Cleaning and Maintenance
Monthly maintenance prevents wear and tear. These tasks focus on lubricating moving parts and checking tension on critical components.
Steps:
- Lubricate Gears & Chains: Apply a thin layer of lubricating oil to the drive system’s gears and chains.
- End Sealing Bearing Lubrication: Add oil to the end sealing bearing.
- Tension Check: Inspect the tension of the drive chains, belts, and tighten them if necessary.
- Screws & Nuts: Check for loose screws and nuts; tighten them as needed.
- Carbon Deposit Check: Inspect and clean carbon deposits if necessary.
Biannual Check and Maintenance
Twice a year, a thorough check of all major components ensures your flow wrapper stays in peak condition.
Steps:
- Inspect Drive Belts: Examine the drive and flat conveyor belts for wear and replace them if necessary.
- Replace Worn Parts: Check all wearing parts and replace any that are significantly worn.
- Drive Part Inspection: Inspect the drive components for wear or damage, replacing them as needed.
- Electrical System Check: Check all electrical wiring, tighten loose connections, and use compressed air to clean dust from electrical components.
Examples

- Problem — The film is not moving through the rollers.
- Solution — Make sure that the rubber CAM roller is engaged with the drive roller by turning its handle to the 'Shut' position.
- Explanation — The rubber CAM roller on most machines is black or orange, and it is moved by turning a handle (see image to the right) that shuts or opens it. Ensure before running the machine that the CAM roller is in contact with the drive roller, with the film between them.
- Problem — The film is coming out of the finwheels in the mid-seal.
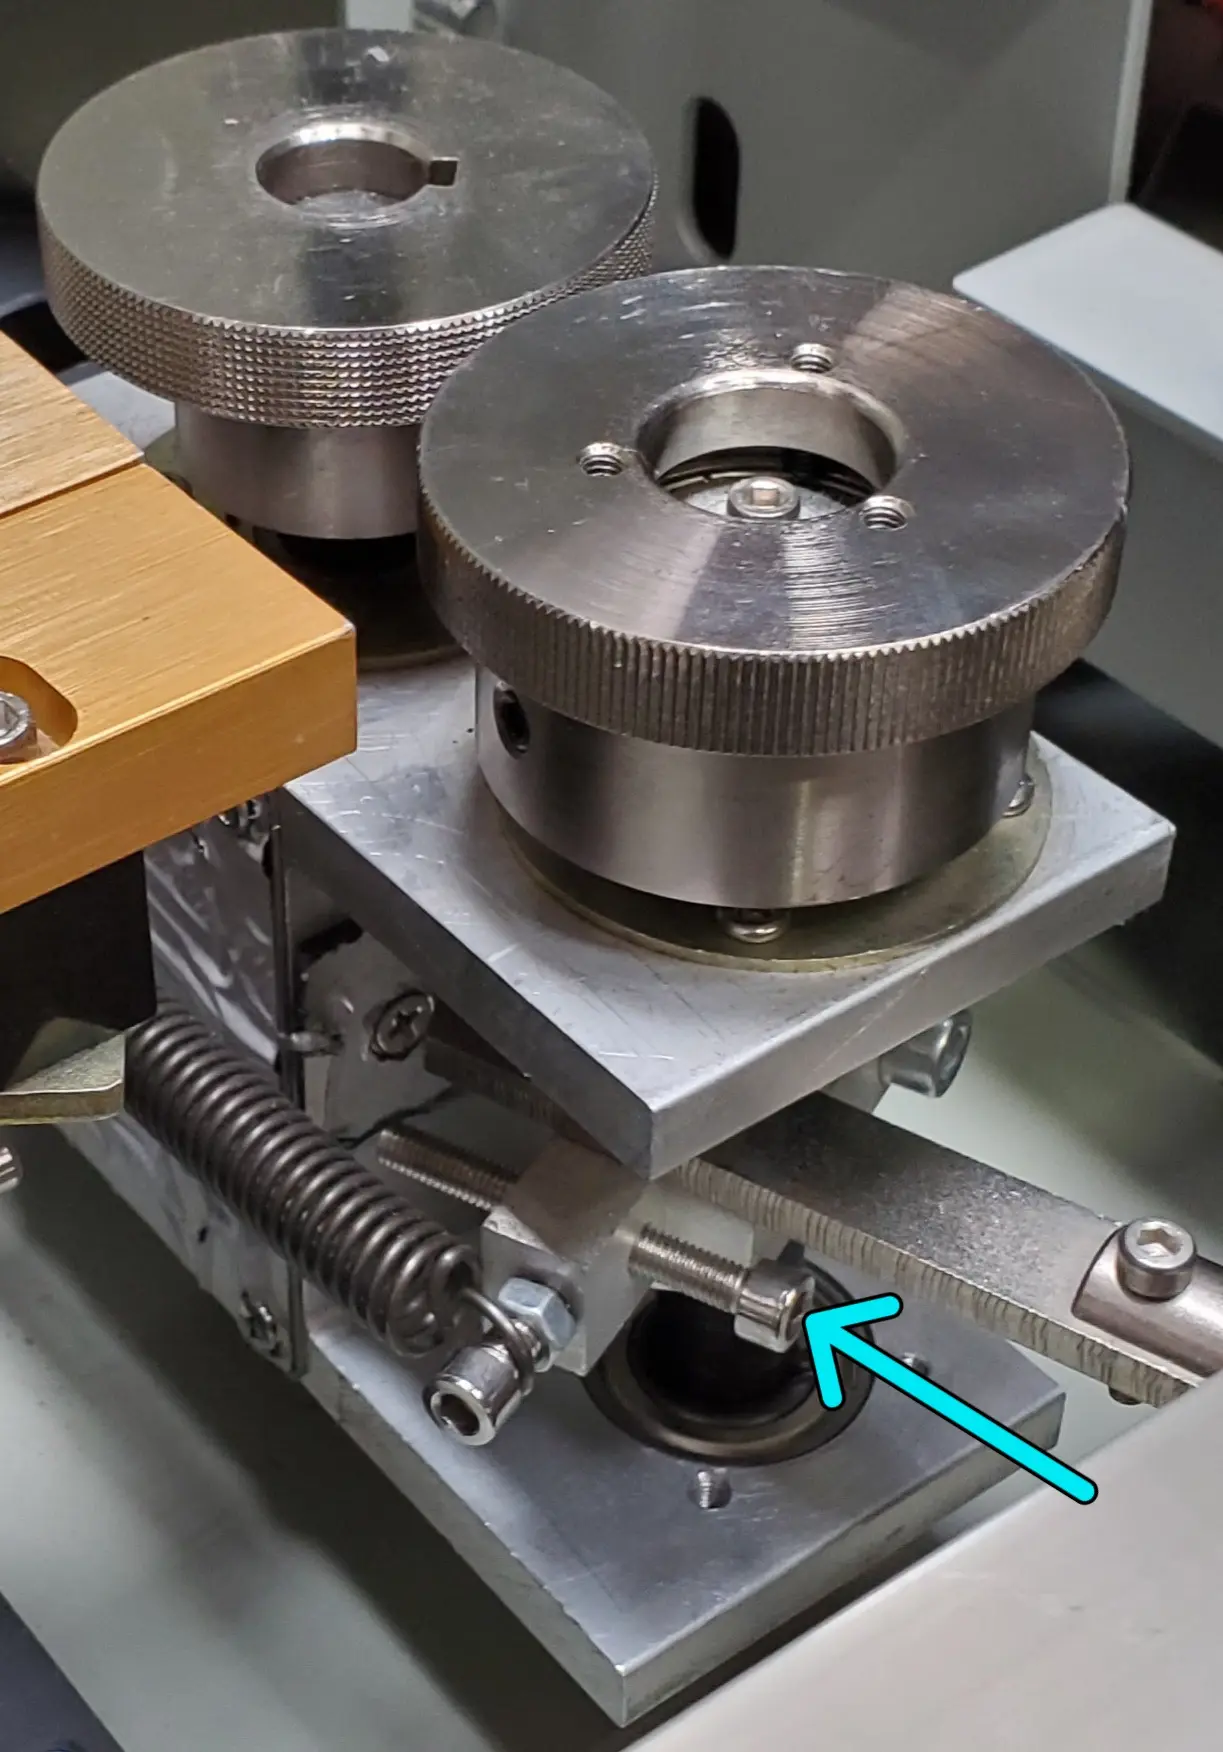
- Solution — Increase the pressure on the finwheels by adjusting a socket head cap screw on the assembly.
- Explanation — If on your machine the mid-seal mechanism is located underneath the bag-forming area, the two stainless steel panels covering it will need to be removed. Unscrew the top panel screws that secure the panels. Seen in the image on the right is the location of the finwheel adjustment screw for our F987S Flow Wrapper machine. Turning the screw counterclockwise will increase the contact pressure between the two wheels once the lever is reengaged. When adjusting the finwheel pressure, only turn the screw a few rotations at a time. Reload the film through the mid-seal, start the machine and see if the problem persists. It the film is still coming out, increase the pressure a bit more. Note: Different machines may have the finwheel pressure adjustment screw to increase pressure when turned clockwise.
- Problem — The amount of film in the mid-seal area is not consistent (coming out of or being pulled into the finwheels).
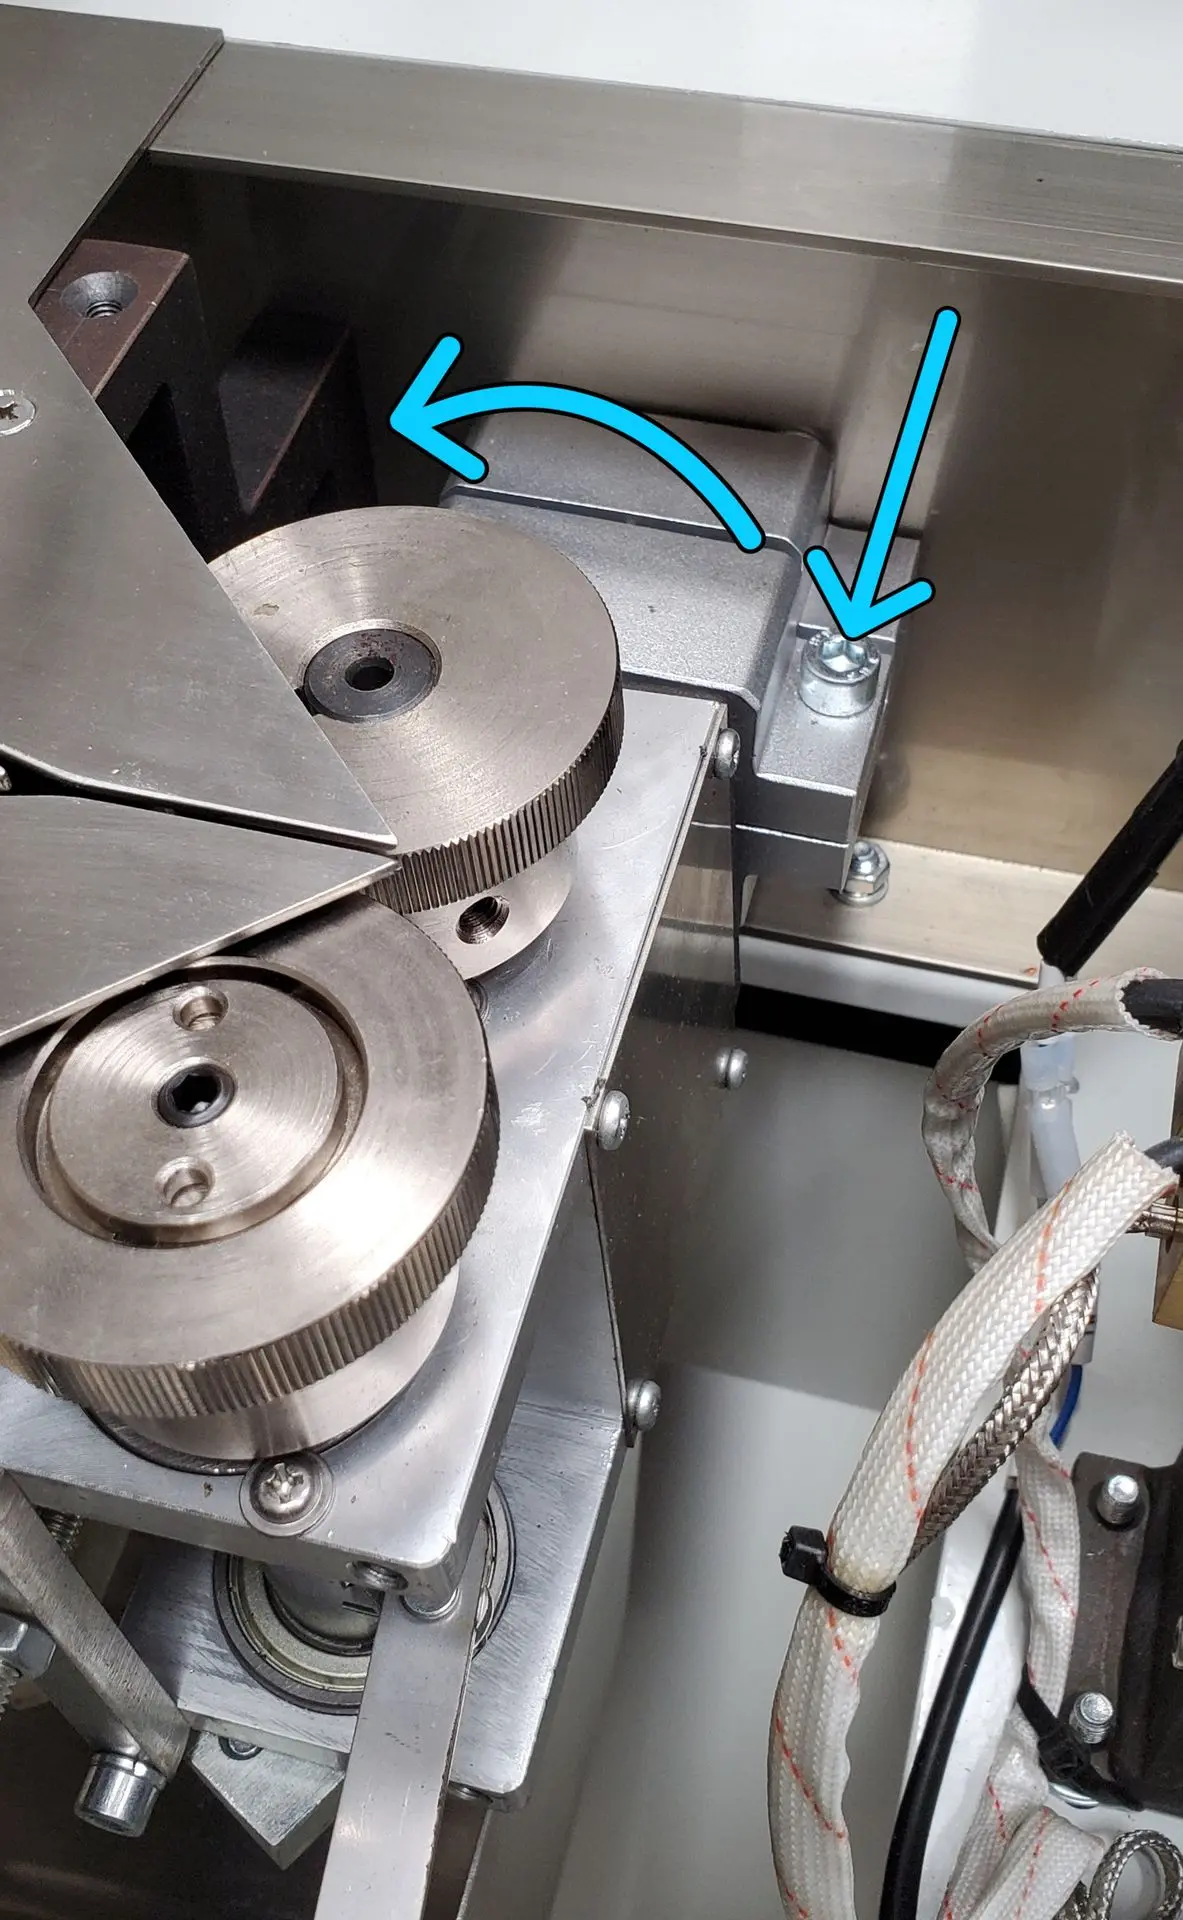
- Solution — Adjust the angle of the finwheel assembly.
- Explanation — The angle of the finwheel assemblies on your machine can be changed. The image on the right shows the location of the socket head cap screw (see blue arrow pointing down) that anchors the rotation of the finwheel assembly. Turn the screw counterclockwise to allow the assembly to pivot. After loosening the screw, use your hand to adjust the angle of the finwheel assembly. Usually, the angle of the finwheels should be rotated counterclockwise with respect to the top of the stainless-steel paneling. Increase the angle of the finwheels in small increments, reload the film and run the machine. If the problem persists, continue to increase the angle of the finwheels until the amount of film that passes through the mid-seal remains consistent. When the problem is resolved, re-tighten the socket head cap screw. Note: It is rare for the angle of the second (exit) finwheel assembly to need to be adjusted. It should remain level.
- Problem — Product is 'jumping' or moving inconsistently when leaving the bag former.
- Solution — Adjust the height of the stainless-steel pusher chain nose piece.
- Explanation — The image to the right shows the stainless-steel pusher chain nose piece, which is usually shaped like an arrow that points in the direction that the product moves and it comes directly after the bag former. The top surface of this piece needs to be a few millimeters taller than the stainless-steel surfaces adjacent to it. If it is lower, the product coming through may snag or get caught momentarily during the transition between the two surfaces. This is what causes the product to 'jump'. Directly under the conical Phillips head screw on the nose piece is a mounting bracket that adjusts its height. Using an Allen key, loosen the socket head cap screw securing the bracket to the machine frame. Then push the nose piece to the desired height and retighten the screw.

Need Assistance?
For help with maintenance or to schedule professional servicing, contact our team of experts. Regular maintenance ensures your machine runs efficiently and extends its lifespan.